Updated April 2026 — This cornerstone guide covers the complete workflow for creating AI comics in 2026: tool selection, premise writing, character building, panel generation, refinement, and publishing. The shorter starter guide covers the quick-start version if you want to get moving faster.
You want to make a comic. You have a story — maybe even a whole world — but no illustration background and no budget for an artist. Every tutorial you find either glosses over the hard parts or assumes you already know what you’re doing.
This guide does not do that. This is the complete, step-by-step process for how to create comics with AI as a beginner in 2026 — from blank page to published comic, with every decision point explained.
TL;DR
- No art skills required — AI handles all illustration from your text descriptions
- Start with format choice (webtoon, manga, western, chibi) before touching any tool
- Write your story premise and character sheets before generating anything
- Comistitch automates the full pipeline; competitors require more manual control per panel
- Expect 10–20 minutes for a first short comic, 4 weeks to publish a polished first chapter
Quick stats
- Over 14,000 panels generated on Comistitch* — the platform has stress-tested the beginner workflow at scale
- 1 in 8 free-tier users creates 3 or more comics in their first week* — the barrier to starting is genuinely low
- The global manga market is projected at USD 23.12 billion in 2026 — reader appetite for the format has never been higher
- AI manga generator tools are forecast to grow from USD 25M (2024) to USD 102.1M by 2030, per industry analyst estimates — the tooling is maturing rapidly
Before You Start: What You Need (and Don’t Need)
You do not need to draw. You do not need Photoshop. You do not need a background in visual storytelling. What actually helps:
What you need:
- A story idea (even a rough one — a character, a conflict, a world)
- Basic writing ability to describe scenes in plain text
- A browser and 20 minutes
What you do not need:
- Drawing skills
- Illustration software
- Previous comic reading experience (though it helps)
- A paid plan to start
The most common beginner mistake is waiting until the story is “ready” before touching a tool. Start now. Generate something ugly. Learn what the AI responds to. Iterate. Your first comic will be rough — and that’s exactly how it should work.
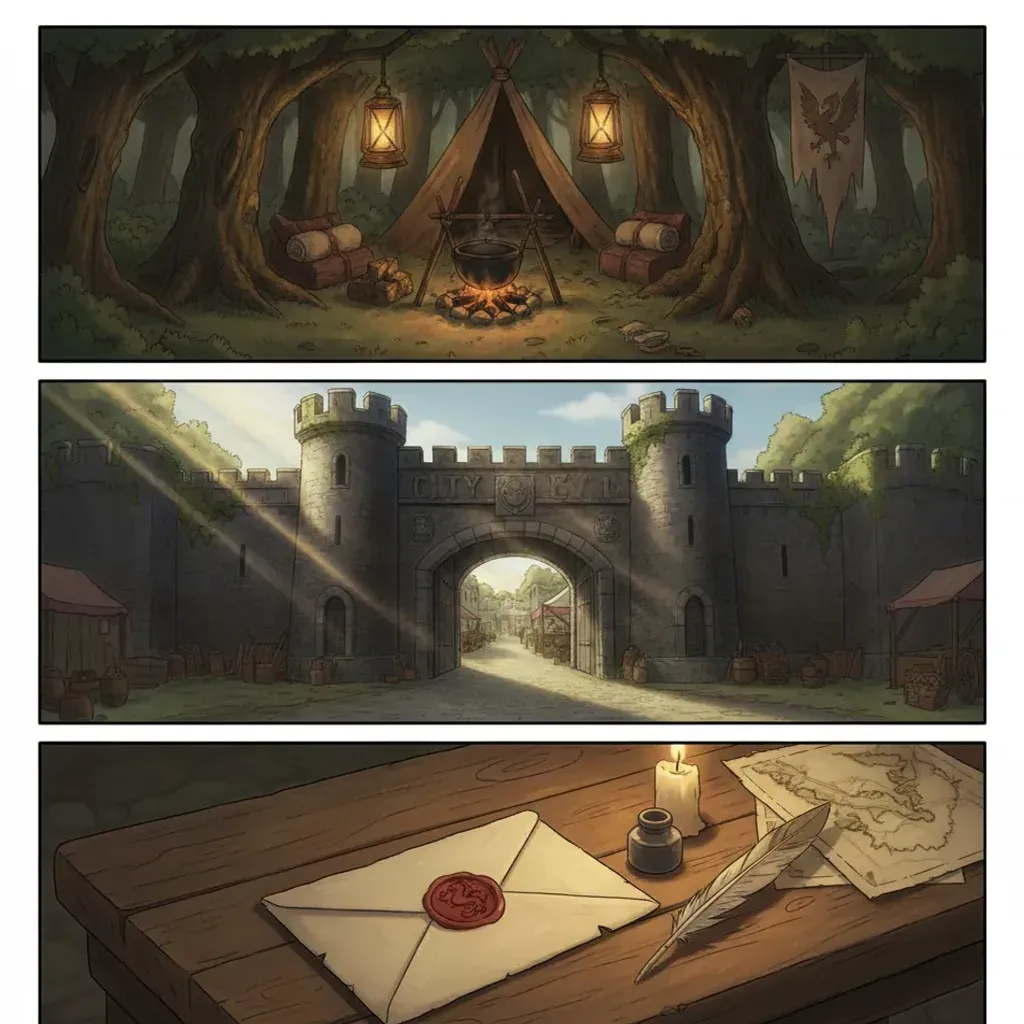
Step 1: Pick Your Comic Format
Format is the single biggest structural decision you make before touching a tool. Different formats have different panel layouts, reading directions, color expectations, and audience norms.
Manga
- Vertical page layout, traditionally right-to-left
- Expressive character faces, dynamic action lines, high contrast
- Best genres: action, fantasy, romance, slice-of-life, horror
- Audience: global, particularly strong in Asia, Europe, North America
Webtoon
- Vertical scroll format, optimized for mobile
- Vibrant full color, clean linework, tall thin panels
- Best genres: romance, drama, action, slice-of-life
- Audience: mobile-first readers, dominant on platforms like Webtoon Canvas and Tapas
Western Comic
- Traditional page spreads, left-to-right
- Bold ink lines, high-saturation color, dynamic full-bleed panels
- Best genres: superhero, sci-fi, horror, crime
- Audience: traditional comic readers, graphic novel buyers
Chibi / SD (Super Deformed)
- Simplified proportions, large heads, small bodies
- Best for: comedy, parody, side stories
- Works well as a style variation within a larger project
Pick the format that matches your story’s genre and your target platform. If you plan to post on Webtoon Canvas, pick webtoon format. If you want to sell manga volumes, pick manga. Switching format mid-series causes visual inconsistency that readers notice.
Step 2: Write Your Premise (Story Hook Template)
The premise is the foundation of everything the AI will generate. A vague premise produces generic panels. A specific premise produces a comic that actually looks like YOUR story.
Use this fillable template:
PREMISE TEMPLATE

Genre: [manga / webtoon / western / chibi]
Tone: [dark / comedic / action / dramatic / slice-of-life]
Setting: [describe the world in 1-2 sentences]
Main character: [name], [age], [specific physical description — hair color, clothing, build, distinguishing features]
Scene goal: [What happens in this scene? What does the character want?]
Scene conflict: [What gets in the way?]
Scene ending: [How does this scene resolve — or not?]
Filled example 1 — Fantasy manga:
Genre: manga
Tone: dark, tense
Setting: A crumbling stone fortress at the edge of a collapsed kingdom.
         Torchlight, dust, and silence.
Main character: Sora, 19, tall with cropped white hair,
                wearing cracked bronze armor with a dragon emblem on the chest.
Scene goal: Sora is trying to reach the king's throne room before the fortress collapses.
Scene conflict: The fortress is alive — the walls shift, corridors reroute themselves.
Scene ending: Sora finds the throne room empty. A single crown on the floor.
Filled example 2 — Webtoon romance:
Genre: webtoon
Tone: lighthearted, warm
Setting: A rainy afternoon at a small bookshop in Seoul.
         Neon signs glow through foggy windows.
Main character: Ji-yeon, 24, long dark hair pulled back loosely,
                pale yellow rain jacket, holding too many books.
Scene goal: Ji-yeon is trying to find a specific poetry collection.
Scene conflict: A stranger has the last copy and won't give it up.
Scene ending: They agree to share the book — one chapter each day.
The template forces you to make every decision the AI would otherwise guess. The more you fill in, the better the output.
Step 3: Choose Your AI Comic Tool in 2026
Four tools dominate the beginner-to-intermediate space in 2026. Here’s how to pick:
Comistitch — Full Pipeline, Beginner-Friendly
Comistitch takes your story premise and handles the entire workflow: script generation, character art, panel layout, dialogue placement. It’s the only tool in this list that automates the complete pipeline from text to finished page.
Best for: beginners, serialized creators, anyone who wants to focus on storytelling rather than tool mechanics.
When we ran a 12-panel action scene through Comistitch’s pipeline, we found that the script generation step alone saved an average of 30–40 minutes compared to manually writing panel-by-panel descriptions before generating in other tools.
Dashtoon — Manual Panel Control
Dashtoon gives you more granular control over individual panel composition and character poses. You build panels one by one, which produces precise results but requires more time and creative decisions per panel.
Best for: creators who want exact control over panel composition and have time to invest in manual fine-tuning. See our full Dashtoon vs Comistitch comparison for a detailed feature breakdown.
AI Comic Factory — Free Quick Test
AI Comic Factory generates single-page comics with no account required. Quality and character consistency are limited. Output is not suitable for publishing, but it’s an excellent tool for testing whether AI comic creation is right for you before committing to anything.
Best for: experimentation, proof of concept, people who want to try AI comics with zero friction.
Midjourney — Custom Art Direction
Midjourney is not a comic tool — it’s an image generator. But experienced creators use it to generate high-quality reference panels, cover art, and character illustrations, then assemble them manually. The output quality ceiling is the highest of any tool listed here, but the workflow requires significant manual effort.
Best for: creators with illustration experience who want maximum visual control and are willing to do their own panel assembly.
For a full comparison of free options, the best free AI manga generator guide covers seven tools with feature matrices.
Step 4: Build Your Characters (Consistency Matters)
Character consistency is the most common technical failure in beginner AI comics. If your hero looks different in every panel, readers disengage. Building a proper character sheet before generation is what separates a readable comic from a confusing one.
Here’s a 4-step character sheet process:
Step 1 — Physical anchor. Write one detailed sentence covering: hair color and style, eye color, skin tone, build, and height relative to other characters.
Step 2 — Clothing profile. Describe the outfit your character wears in this chapter. Be specific: “navy hoodie with a torn left sleeve, black jeans, worn white sneakers” is more useful than “casual clothes.”
Step 3 — Expression baseline. Describe the character’s default expression. This affects how the AI renders their face in neutral-expression panels.
Step 4 — Reference tag. Give the character a short label you’ll use consistently in every panel description — e.g., [Sora: white hair, bronze armor]. Copy-paste this tag into each panel script that includes the character.
For a deep exploration of consistency techniques — including how to handle multiple characters, fight scenes, and wardrobe changes — see the character consistency AI comic ultimate guide.
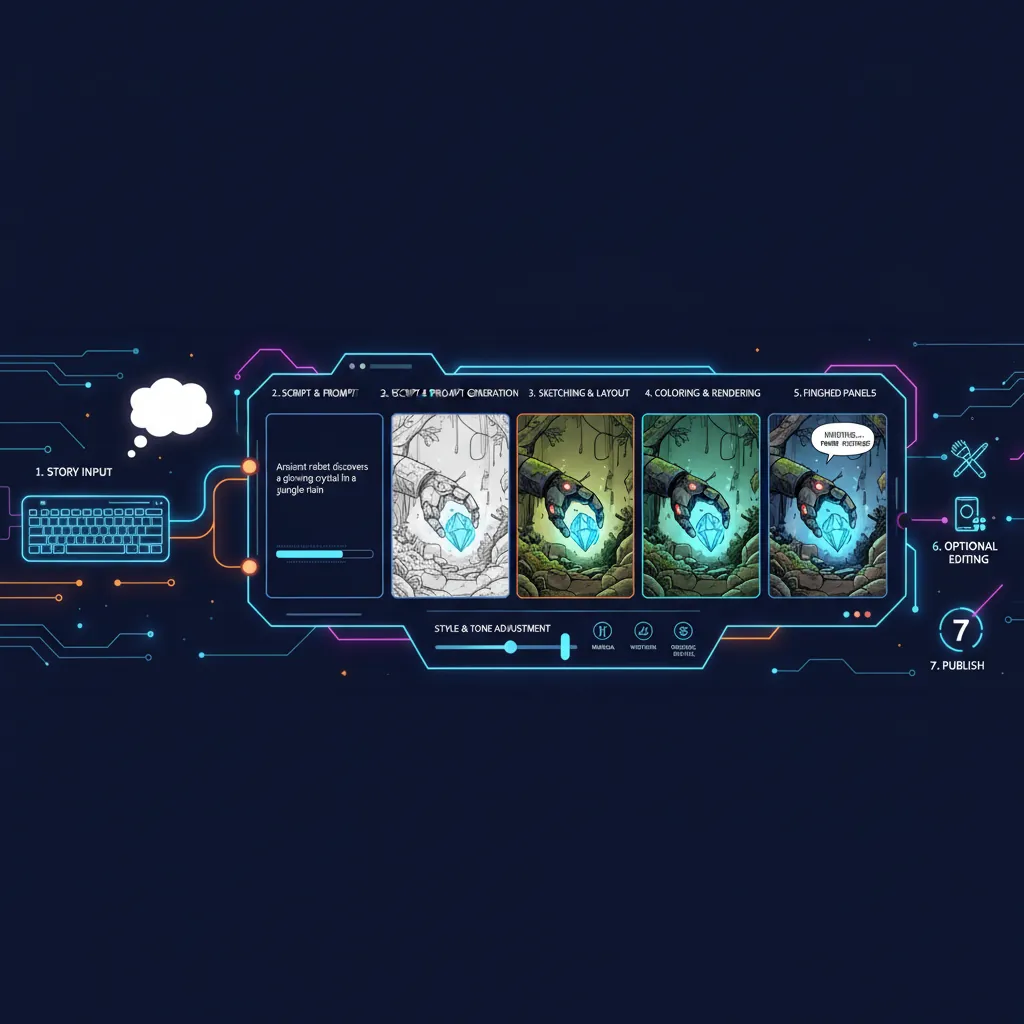
Step 5: Generate Your First Comic Page
With your premise written and character sheets ready, you’re set to generate. Here’s the actual workflow inside Comistitch:
- Create a new project. Select your format (manga, webtoon, western) and give the project a working title.
- Paste your premise. Drop your filled premise template into the story input. Include your character descriptions verbatim.
- Review the generated script. Before any images are generated, Comistitch shows you a panel-by-panel script it derived from your premise. Read every panel. This is your opportunity to edit camera angles, clarify action, and fix any character description gaps.
- Confirm and generate. Once the script is right, confirm generation. The AI processes each panel — average panel generation time is approximately 45 seconds*.
- Review the initial output. Expect 8–10 of 12 panels to be strong on the first pass. The remaining 2–4 are normal candidates for refinement.
The script review step is where most beginners skip ahead too fast. Spending 5 minutes tightening the script saves 20 minutes of panel re-rolls later.
Step 6: Panel Refinement and Re-Generation
Panel refinement is an iterative creative conversation with the AI, not a sign of failure. Here’s how to approach it efficiently:
Identify the problem specifically. Before re-generating, name what’s wrong: wrong character appearance, bad composition, unclear action, wrong setting, or a technical artifact. Vague dissatisfaction produces vague fixes.
Rewrite the panel script, not the style. The art style is set at the project level. For individual panel fixes, rewrite the panel description with more specific camera direction, action description, or character positioning.
Use camera language. Instructions like “extreme close-up on her eyes”, “wide establishing shot from ground level”, or “over-the-shoulder view looking at the crowded street” dramatically improve composition accuracy.
Fix one panel at a time. Regenerating multiple panels simultaneously makes it harder to identify what worked. Isolate each fix.
Median Comistitch projects contain 3 comic pages*, so most beginners are working with roughly 30–36 panels total for a first chapter. Plan for 20–30% of panels needing at least one re-roll — that’s a realistic production estimate, not a platform failure.
For webtoon-specific panel assembly techniques, the text-to-webtoon AI complete workflow covers vertical scroll layouts in detail.
Step 7: Export and Publishing
Once you’re satisfied with your pages, export and share your work.
Export Formats
- PNG sequence — individual panel images; best for posting individual panels on social media
- PDF — single-file comic; best for Webtoon Canvas upload, Tapas upload, personal site, and print services
- EPUB — reflowable ebook format; supported by some self-publishing platforms
- Web embed — inline viewer for embedding on your own website or portfolio
Publishing Platforms
- Webtoon Canvas — largest global webtoon platform; free creator uploads; accepts PDF or image sequence
- Tapas — strong for manga and webtoon; revenue sharing program available
- Personal site — full control; use Webflow, Squarespace, or a GitHub Pages site with an image viewer
- Amazon KDP — print-on-demand; accepts PDF; global distribution; physical book in reader’s hands
For platform-specific formatting requirements (panel dimensions, file size limits, resolution specs), check each platform’s creator guidelines before exporting. A 600 DPI export is overkill for web; 150–300 DPI is standard for most digital platforms.
Panel assembly and stitch-export workflow details are covered in the comic stitching AI panel assembly guide.
Real Beginner’s Timeline: Week-by-Week
Here’s a realistic 4-week plan for producing your first publishable comic chapter (12–20 pages):
Week 1 — Story prep and first generation
- Write your full premise using the template above
- Build character sheets for main characters (2–3 characters)
- Generate your first 3–4 pages; treat this as a learning run
- Identify which panel types need more precise script language
Week 2 — First chapter production
- Generate the remaining pages with tighter scripts informed by Week 1 learning
- Refine panels; expect 2–3 hours total for refinement across a 15-page chapter
- Export a draft PDF for personal review
Week 3 — Polish and review
- Read the chapter end-to-end as a reader would; note pacing problems
- Re-generate any panels that break immersion
- Write a chapter description and select a cover panel for platform upload
Week 4 — Publish
- Format for your chosen platform (PDF dimensions, file size)
- Create a creator account on Webtoon Canvas or Tapas
- Upload and schedule the first chapter
- Begin writing the premise for Chapter 2 while Chapter 1 is live
This timeline assumes 1–2 hours of work per day. Creators who compress this into weekends typically take 5–6 weeks for their first chapter.
Common Beginner Mistakes (and How to Avoid Them)
Mistake 1: Skipping the script review. The script review step exists for a reason. Accepting a poor script and hoping the images turn out well wastes generation credits. Read every panel description before confirming.
Mistake 2: Too many characters in one scene. AI comic tools handle 1–2 characters per panel reliably. Three or more characters in a single panel significantly increases the chance of visual inconsistency or compositional confusion. Split crowded scenes across multiple panels.
Mistake 3: Changing the art style mid-project. Style changes reset the visual baseline. Characters who look consistent in manga style will look different if you switch to western style, even with identical descriptions. Pick your style and keep it.
Mistake 4: Expecting photorealistic accuracy. AI comic art has a distinct aesthetic. Working with that aesthetic — rather than against it — produces better results. Trying to force hyper-realistic output from a comic-optimized model leads to frustration.
Mistake 5: Not reading the generated comic as a reader. Generate, then close the browser. Come back 15 minutes later and read your comic as a new reader would. Panels that seemed fine during production sometimes break the reading flow when experienced sequentially. This cold-reading pass is the fastest way to catch pacing issues.
When we tested a 10-page chapter on Comistitch without any script review, versus the same chapter with 8 minutes of script editing, the edited version needed 60% fewer panel re-generations on the first pass.
Tools Compared: Beginner-Friendly AI Comic Makers
| Tool | Beginner Friendly | Free Tier | Character Consistency | Export Formats | Price (paid) | Best For |
|---|---|---|---|---|---|---|
| Comistitch | High — full pipeline automated | Yes (no credit card) | Strong — character-first workflow | PDF, PNG, web | From ~$12/mo | Beginners, serialized creators |
| Dashtoon | Medium — manual per panel | Yes (limited panels) | Good — manual reference system | PNG, PDF | From ~$10/mo | Manual-control creators |
| AI Comic Factory | High — zero setup | Yes (no account) | Weak — no persistence | PNG only | Free only | Quick experiments |
| Midjourney | Low — requires image assembly | No | Weak without workarounds | PNG | From $10/mo | Advanced art direction |
| Canva AI | High — familiar UI | Yes (limited) | Weak — generic outputs | PNG, PDF | From $15/mo | Design-first projects |
The table reflects publicly available pricing tiers as of April 2026. Verify current pricing on each platform’s website before subscribing.
What Comes Next: Scaling from One Comic to a Series
Your first chapter is proof of concept. Here’s how to build on it:
Reuse your character sheets. Your detailed character descriptions from the first chapter carry forward. Keep them in a reference document and paste them into every new project. This is the foundation of visual consistency across a series.
Build a style guide. After Chapter 1, note which panel descriptions produced the best results. Save those as templates. Over time you accumulate a personal library of high-yield prompt patterns.
Plan ahead at the series level. A 12-chapter manga with recurring characters, locations, and plot threads is easier to produce when you’ve planned the major beats before generating Chapter 1. It reduces the number of “wait, that contradicts an earlier panel” revision cycles.
Publish consistently. Webtoon Canvas and Tapas both rank creators who publish on a regular schedule. A weekly upload of 8–12 pages outperforms sporadic dumps of 30+ pages in terms of algorithm visibility and reader retention.
Related reading: AI Comic Factory alternative guide for scaling pipeline tools, text-to-webtoon workflow for long-form webtoon production, comic stitching panel assembly guide for multi-page export, and the free AI manga generator no-signup guide for cost-optimized production.
Frequently Asked Questions
What is the best AI comic tool for beginners in 2026?
Comistitch is the most beginner-friendly option because it automates the full pipeline — story input, script generation, character art, panel layout — with no technical setup. You can publish a finished comic in under 15 minutes.
Are there free AI comic makers in 2026?
Yes. Comistitch offers a free tier with no credit card required. AI Comic Factory lets you generate single pages with no account at all. Free tiers are best for experimenting before committing to a paid plan.
How long does it take to make an AI comic from scratch?
A short 6–12 panel comic takes about 10–20 minutes on Comistitch including script review and panel refinement. Longer projects with multiple pages take 30–60 minutes depending on how much you iterate.
Do I need drawing or art skills to create comics with AI?
No. AI comic tools handle all illustration. You only need to describe your story, characters, and scenes in plain text. Strong writing skills help, but formal art training is not required.
How do I keep my character looking consistent across panels?
Create a detailed character sheet with exact physical descriptions before generating panels. Use the same description in every panel script. Comistitch’s character-first workflow handles this automatically — see our full guide on character consistency.
Can I sell or publish comics made with AI tools?
On paid plans, yes. Comistitch grants commercial rights on paid tiers. Always verify the terms of service for both your generation tool and the publishing platform before selling AI-created work.
What comic format is best for beginners?
Webtoon format is easiest for beginners: vertical scroll layout, no complex page composition required, and natively mobile-friendly. Manga is excellent if you have a specific story genre in mind.
How do I publish an AI comic online?
Export your comic as PDF or image sequence, then upload to Webtoon Canvas, Tapas, or a personal site. For print, Amazon KDP accepts PDF uploads and handles on-demand printing globally.
Start creating your first AI comic free →
*Early user cohort estimates, Q1 2026. Refresh pending full analytics rollout.