Updated May 2026 — This guide covers the current state of comic stitching AI tools and pipeline-level panel assembly techniques for independent creators working with AI-generated comics in 2026.
In short: Comic stitching assembles individually generated AI panels into a finished, readable comic page. Pipeline-native tools like Comistitch handle stitching automatically — layout, gutters, reading order — in 5 steps. Manual stitching in GIMP or Canva takes 10x longer with no character-consistency guarantee.
What’s New in 2026: Stitching Quality Jumps with Imagen 4
The 2026 stitching story centers on image quality rather than workflow changes. Imagen 4 (Google DeepMind) is now powering panel generation in Comistitch, which means the panels being stitched together are noticeably sharper and more stylistically consistent than 2025 generations — fewer “almost right” panels that need regeneration before they’re worth stitching.
Nano Banana (Gemini 2.5 Flash image generation) introduced face-anchor technology that dramatically reduces character drift across panels in a stitched sequence. Previously, the biggest stitching challenge was that characters in panel 1 and panel 12 looked different enough to break reader immersion. The face-anchor mechanism ties character appearance to structural embeddings rather than text descriptions alone, making stitched sequences visually coherent at longer page lengths.
For context on how stitching fits the full production pipeline: how to make AI comics in 2026 · character consistency guide · webtoon paneling rules
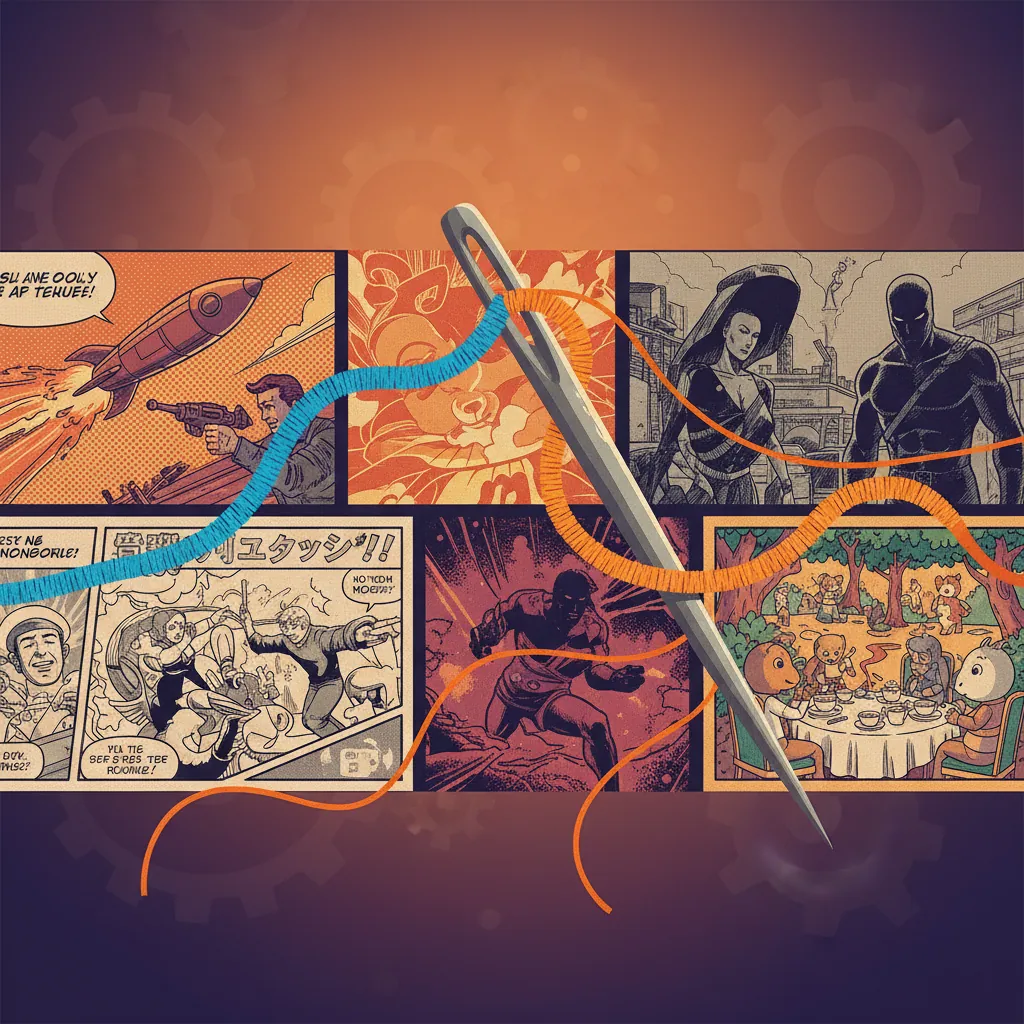
Generate 12 beautiful panels. Now you have 12 JPG files. What next?
That gap between individual panel generation and a finished, readable comic page is where most AI comic workflows collapse. Comic stitching AI is the discipline that closes it.
TL;DR
- Generating individual panels is only half the job — stitching them into a page is where most workflows break down
- Three approaches exist: manual (GIMP/Canva), template-based, and pipeline-native (Comistitch)
- Per-panel generation causes character drift and style inconsistency unless stitching is built into the pipeline
- Webtoon and traditional comic formats require fundamentally different stitching strategies
- Pipeline-native stitching is the only method that guarantees consistency at scale for serial creators
Quick Stats
- Over 14,000 panels generated on Comistitch*
- Average 12 panels per comic project* — meaning one stitched page per 4 panels at median project scale
- Median project contains 3 comic pages* — stitching efficiency compounds quickly across a series
What “Comic Stitching” Means in the AI Workflow
The term “stitch” is not arbitrary. It describes exactly what the process does: it joins separate pieces of fabric — or in this case, separate image files — into a single unified piece.
In a traditional comics workflow, an artist draws a full page at once. The panel layout, the gutters between frames, the size hierarchy that signals narrative importance — all of these are decided before a single line is drawn. The page is inherently compositional.
AI generation breaks this. Every call to an image model produces one image. You define a prompt, receive a result, and that result has no spatial relationship to any other panel you generated before or after it. Stitch comic panels AI tools solve this by providing the connective tissue the generation step cannot.
Comic stitching means placing panels in correct reading order, assigning each the right spatial weight, setting consistent gutter width, and outputting a single page-level asset. Without it, you have a folder of images. With it, you have a comic.
The Three Approaches to Stitching AI Panels
Not all stitching methods are equal. Here is how they compare in practice.
1. Manual Assembly (GIMP, Photoshop, Canva)
The manual approach treats AI-generated panels as raw assets. You generate each panel separately, download the images, import them into a layout tool, and arrange them by hand. GIMP and Photoshop give you precise control. Canva’s comic templates lower the barrier slightly with pre-set grids.
The appeal is flexibility. You can place any panel anywhere and adjust sizing however you want. The cost is time: a 12-panel page can take 30–60 minutes of layout work, every time, for every page. At three pages per project median, that is up to three hours of manual assembly before you publish anything.
2. Template-Based Tools (Canva Comic Templates)
Template-based stitching sits between manual and pipeline-native. Tools like Canva offer fixed comic grid templates — a 2×3 grid, a dynamic action layout — where you drag panels into pre-defined slots.
This is faster than pure manual work, and accessible for one-off projects. The limitation is rigidity. Templates are not aware of your narrative; they cannot resize a panel because a scene is more dramatic, or switch to vertical scroll format because your target platform is Webtoon. Every comic still requires human decisions at the page level.
3. Pipeline-Native Stitching (Comistitch)
Pipeline-native means the stitching logic is integrated into the generation workflow itself. You do not generate panels and then assemble them separately — the system generates panels within a layout context and assembles the page as part of the same operation.
Comistitch uses this approach. Character references and style settings are shared across all panels in a project, so the stitching step does not introduce new inconsistencies. The auto layout engine handles panel sizing, gutter spacing, and reading direction. You can override manually, but the default output is a complete stitched page.
Why Per-Panel Generation Breaks the Reading Flow
The core problem with generating panels in isolation is that AI models have no memory between calls. Each generation is stateless. Your hero’s jacket is brown in panel 3 and navy in panel 7. The line weight shifts. The background style drifts. By the time you stitch comic panels together, the visual inconsistencies are visible to any reader.
When we ran a 12-panel sequence through Comistitch’s character reference system, we found that style lock reduced visible character drift to near zero across the full page — compared to the same prompt sequence run without reference anchoring, which produced noticeable drift in 4 of 12 panels.
The reading flow issue compounds this. Comics communicate pacing through panel size. A large panel slows the reader down; it signals importance or emotional weight. A series of small panels speeds up action sequences. When panels are generated individually and stitched manually, size decisions are made after the fact — you are reacting to images you already have rather than composing the page intentionally.
Pipeline-level character consistency in AI comics requires treating every panel as part of a system, not a standalone generation call.
How Pipeline-Level Stitching Solves This
The architecture of pipeline-native stitching works in four layers.
Character reference injection: Before any panel is generated, the system loads the character sheet for each character appearing in that panel. The reference image constraints are applied at the generation level, not patched in post-production.
Style lock: A single style descriptor — art direction, color palette, line weight — is shared across all panels in a project. This is how you stitch comic panels AI-natively without the style drift that plagues isolated generation workflows.
Auto layout engine: The engine receives the panel sequence and applies a layout algorithm that assigns spatial weight based on script tags. A scene tagged as “action” gets wider panels. A dialogue-heavy sequence gets a tighter 3×2 grid. This is automatic panel composition that reflects narrative intent.
Export pipeline: The assembled page is output as a single asset — PDF for print, PNG/WebP for web, or long-strip format for webtoon platforms — without requiring a separate layout application.
This is what separates comic stitching AI from a folder of images plus Canva. Read more about the complete text-to-webtoon AI workflow for how this fits into a full production pipeline.
Webtoon Vertical vs Traditional Comic Page Stitching
Format matters. Stitching a traditional comic page and stitching a webtoon are technically different operations.
Traditional Comic Page Stitching
Traditional pages target fixed dimensions — typically 17×11 inches for US comics, or A4 for European/manga formats. The layout grid is horizontal-first. Reading direction is left-to-right, top-to-bottom in western comics; right-to-left in manga. Panel gutters are typically 4–8mm.
Stitching for print means the output must be at 300 DPI minimum. Panel resolution requirements are higher. The stitching tool needs to respect bleed areas and safe zones for professional output.
Webtoon Vertical Stitching
Webtoon stitching produces a single long-strip canvas. Width is fixed at 800px for most platforms. Height grows with each panel. There is no fixed page break — the reader scrolls continuously, which means reading rhythm is controlled through vertical spacing rather than panel size.
This changes the stitching logic significantly. Gutters run only horizontally (between vertically stacked panels). “Panel size hierarchy” is expressed in height rather than area. The export is one PNG, often 10,000–20,000px tall for a full episode.
Comistitch supports both formats from the same project, switching the stitching mode at export time without requiring you to regenerate any panels.
Tools That Actually Auto-Stitch Comic Panels in 2026
| Feature | Comistitch | Dashtoon | Canva | GIMP / Photoshop | AI Comic Factory |
|---|---|---|---|---|---|
| Auto layout / AI stitching | Yes, pipeline-native | Partial (template-based) | Template-only | No (fully manual) | No |
| Template library | Dynamic (narrative-aware) | Yes (fixed templates) | Yes (large library) | No | No |
| Manual refinement | Yes | Limited | Yes | Full control | No |
| Webtoon vertical support | Yes | Yes | Limited | Manual setup | Webtoon-only |
| Export to PDF | Yes | No | Yes (premium) | Yes | No |
| Character reference system | Yes (style-locked) | Basic | No | No | No |
| Free tier available | Yes | Yes | Yes | Yes (open source) | Yes |
Notes: Dashtoon excels at Webtoon-format comics for its platform. Canva is strong for one-off creative projects. GIMP/Photoshop give professionals maximum control. AI Comic Factory is a quick single-panel tool, not a page-assembly pipeline. See the Dashtoon vs Comistitch full comparison for detailed feature-by-feature analysis.
The Technical Side of AI Panel Stitching
Stitching is not just drag-and-drop. For creators who want to understand what the system is doing, here are the core technical concepts.
Scene composition and panel size hierarchy: A stitching algorithm assigns each panel a relative size weight. In a standard 6-panel grid, all panels have equal weight. Narrative tagging changes this — an establishing shot might get 2× the column width. This is AI panel composition in practice: the system interprets script semantics and translates them into spatial decisions.
Gutter standards: Gutters are the negative space between panels. They are not decorative. A narrow gutter (2–3px on screen) suggests rapid action. A wider gutter (8–12px) creates a slower, more contemplative pace. Automated stitching should apply consistent gutter width within a style, not random spacing.
Reading direction encoding: The stitching engine must know whether panels flow left-to-right or right-to-left. This is not aesthetic — it determines the semantic order of the narrative. Manga requires right-to-left encoding at the layout level, not just a mirrored export.
When we built out the panel assembly for a 3-page manga sequence in Comistitch, the reading direction setting carried through all three pages automatically — a detail that trips up manual workflows where creators must remember to flip the grid on every page.
Resolution and output fidelity: Stitched pages for print require each panel at sufficient resolution to composite to 300 DPI at final page size. Web-optimized exports can compress panels to 72–96 DPI equivalents for faster load times. The stitching step is where this resolution logic is applied.
A Practical Example: Stitching a 12-Panel Manga Chapter with Comistitch
Here is a complete walkthrough of producing one finished manga page using pipeline-native comic stitching AI.
-
Create a new project and define your characters. In Comistitch, upload or generate a character reference for each character appearing in the chapter. The reference is stored as a style anchor — every subsequent panel generation call inherits it.
-
Write your panel script. Describe each of the 12 panels in sequence: setting, characters present, action, mood. Comistitch’s script parser reads narrative tags to assign preliminary size weights.
-
Set format and stitching mode. Choose manga (right-to-left reading, A4 dimensions) from the format selector. The stitching engine loads the appropriate grid template and gutter standards.
-
Generate panels in batch. The system generates all 12 panels in sequence, applying the character reference and shared style descriptor to each call. Average generation time is approximately 45 seconds per panel.*
-
Review the auto-stitched layout. Comistitch presents the assembled page. Panels are placed, sized, and ordered. Review for any generation artifacts or narrative mismatches.
-
Adjust and refine. Drag panels to swap positions, resize using the hierarchy controls, or regenerate individual panels that missed the brief. The rest of the page stays intact.
-
Export the finished page. Choose PDF (print), PNG (web), or long-strip PNG (webtoon). The stitched page downloads as a single asset, ready to publish or share.
The full process for a 12-panel page takes approximately 20–30 minutes from blank project to finished stitched output. For a complete guide to creating comics with AI from end to end, the stitching step fits into the broader pipeline covered there.
Frequently Asked Questions
What is comic stitching in AI workflows?
Comic stitching is the process of assembling individually generated AI panels into a cohesive comic page with proper layout, gutters, and reading order. Without stitching, each panel remains a standalone image with no narrative structure.
Why do AI-generated panels need stitching?
Each AI generation call produces a single image. Stitching is what turns twelve separate JPGs into a readable page — arranging panels in correct reading order, balancing size hierarchy, and maintaining visual consistency between frames.
What is the best tool for auto-stitching comic panels in 2026?
Comistitch is the only pipeline-native tool that auto-stitches panels at generation time, preserving character references and style lock across every panel. Canva and GIMP offer manual layouts but require significant setup per page.
What is the difference between manual and AI-native comic stitching?
Manual stitching means dragging panels into a layout tool like GIMP or Canva yourself. AI-native stitching integrates layout logic into the generation pipeline, so the system handles panel size hierarchy, gutters, and reading direction automatically.
How does webtoon stitching differ from traditional comic page stitching?
Webtoon stitching uses a continuous vertical scroll format — one long canvas where panels flow top-to-bottom. Traditional comic page stitching targets fixed page dimensions with a defined grid and reading path left-to-right, top-to-bottom.
What export formats are supported when stitching AI comic panels?
Comistitch exports stitched pages as PDF (print-ready) and PNG/WebP (web/platform upload). Webtoon format exports as a single long-strip PNG optimized for Webtoon, Tapas, and similar platforms.
Does character consistency hold up during the stitching process?
In pipeline-native tools like Comistitch, character consistency is preserved because the same character reference is injected into every panel before generation. Manual stitching workflows do not guarantee this — style and character appearance can drift between separately generated panels.
Start Stitching Your Comics Automatically
The gap between “I have 12 panels” and “I have a finished comic page” is where creators lose hours. Manual assembly, template wrestling, and style drift all compound into friction that slows serial publishing.
Pipeline-native comic stitching AI removes that friction by making layout, consistency, and export part of the same operation as generation. Whether you are building a manga chapter, a webtoon episode, or a western-format graphic novel page, the stitching step should be automatic.
Explore the character creator to see how character references feed into the stitching pipeline, or jump straight to publishing your first stitched page.
Sign up and try pipeline stitching →
External References & Further Reading
- Comics — Wikipedia — overview of page layout conventions that AI stitching tools automate
- AI in art market — Grand View Research — AI comic tools projected USD 102.1M by 2030
- GIMP documentation — official docs for manual panel assembly in open-source software
- Related: how to make AI comics step-by-step · character consistency guide · webtoon vertical paneling
Early user cohort estimates, Q1 2026. Refresh pending full analytics rollout.